Customize the video scoreboard
LDSscoreboard is a video scoreboard application that incorporates a set of video scoreboard configuration examples that we hope will serve as a basis for your custom configurations. These predefined scoreboards that come with the application are not intended for you to use directly but for you to modify and tweak them to make your own video scoreboard.
In this short tutorial, which will show you how to customize your scoreboard, we will take as a reference the soccer scoreboard for its simplicity, this way you will become familiar with the video scoreboard editing environment that LDSscoreboard incorporates. We will replace the team names with the shields of the teams that will be playing.
This article is part of the guide“Introduction to sports scoreboard software“.
| Initial configuration | Step-by-step creation of a video scoreboard |
Configure the test environment
We assume that you have made a basic configuration to be able to display your video scoreboard in the appropriate resolution on your LED display, even though the output device may be your monitor. You don’t need to work with the LED display, you can do it on your monitor, and then redirect the output to the corresponding HDMI. More information on the configuration page.
Before we start we are going to copy the images of the teams’ shields into the folder that contains the images and videos files of the application. You could place it in other directories but, when changing the version, you will have to reestablish the file locations, so if you place it in the directory called “media” of the application the version change will be very fast and easy. Then we are going to place the shields inside the “clubs” directory in the media directory.
Load and edit the video scoreboard
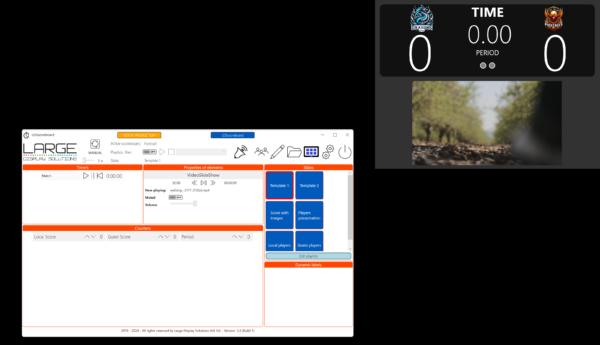
First start LDSscoreboard and by clicking on the directory icon open the window for loading a video scoreboard. Select the soccer one and press “Ok”. In the control panel you will see that the active Marker is “Football”.
Now open the video scoreboard editor, which is the button shaped like a pencil. Then you will see the video scoreboard editor where on the right side you will be able to see the different slides or views of the scoreboard and you will have selected the first one, which is the one you will be seeing on screen.
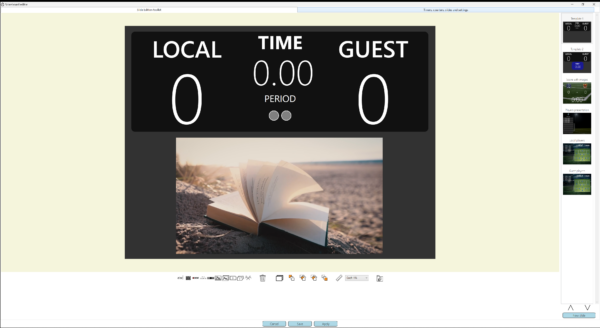
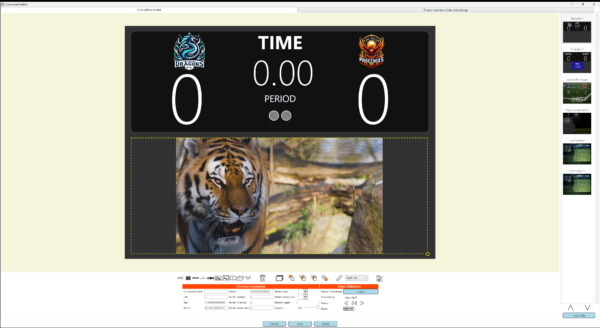
In this slide you will be able to see the time, the period of the game, the goals scored by each team, the team names and a set of videos that can be commercials or any other video you wish.
Click on the text “LOCAL”, select the item, and click on the trash can icon, which is located in the toolbar below the slide. Repeat the operation with the name “GUEST”. You will then have eliminated the names of the two teams.
Inserts images on the video scoreboard
A basic change in the process of customizing your video scoreboard is to place the shields of each team, click on the insert an image tool and an image selection window will open. Go to the “clubs” directory, which is where you have previously placed the shields of the teams you want, and select the shield you want. This operation will make the logo appear in the center of the slide, click with the mouse, and without releasing the button, move it to the desired location. Then with the mouse click on the resize mark and adjust the image size to your liking.
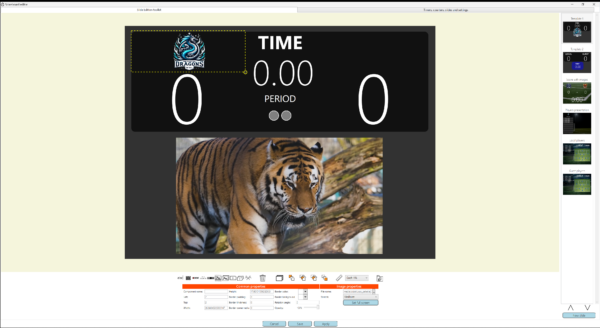
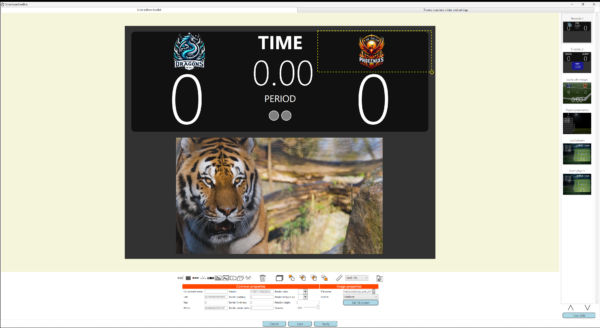
Now, with the shield selected, click on the “Duplicate” tool, which is the one to the right of the trash can, and a copy of the shield you have placed will appear. Drag this copy to the position of the second shield. This way the two images will have the same size. The last step is, with the second shield selected, click on the button with the three dots “…” next to the file name in the properties area, and select a second shield.
Place a video playlist on your video scoreboard
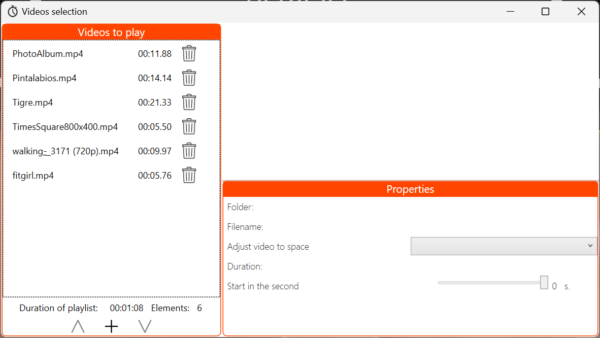
As the last step in the process of customizing your video scoreboard, we are going to change the videos that appear on the slide. To do this, select the video area of the slide, and in the properties, click on the button “Videos”.
When you click on the “Videos” button, a window will appear where you can delete, reorder (by dragging and dropping) the videos or add new ones. As before, we recommend that you copy your videos into the “Media” folder with the organization you consider appropriate.
When you are satisfied, close the window, and click on the save button in the editor window.
Now, in the control panel, click on the modified slide to activate it and check if the process of customizing your video scoreboard went as expected.

